

It might not get the same level of attention as the stove or refrigerator, but your kitchen sink is a critical component. It’s both functional and aesthetic and provides a workspace while setting the tone for the overall design of your kitchen. That’s one of the reasons so many people choose to upgrade their aging kitchen sink.
Swapping out that aging sink for a new farmhouse sink can also be a worthwhile investment if you decide to sell the home down the road. Architectural Digest reports that a kitchen upgrade like this comes with a 67% return on your investment (a complete kitchen renovation offers an ROI of 75%).
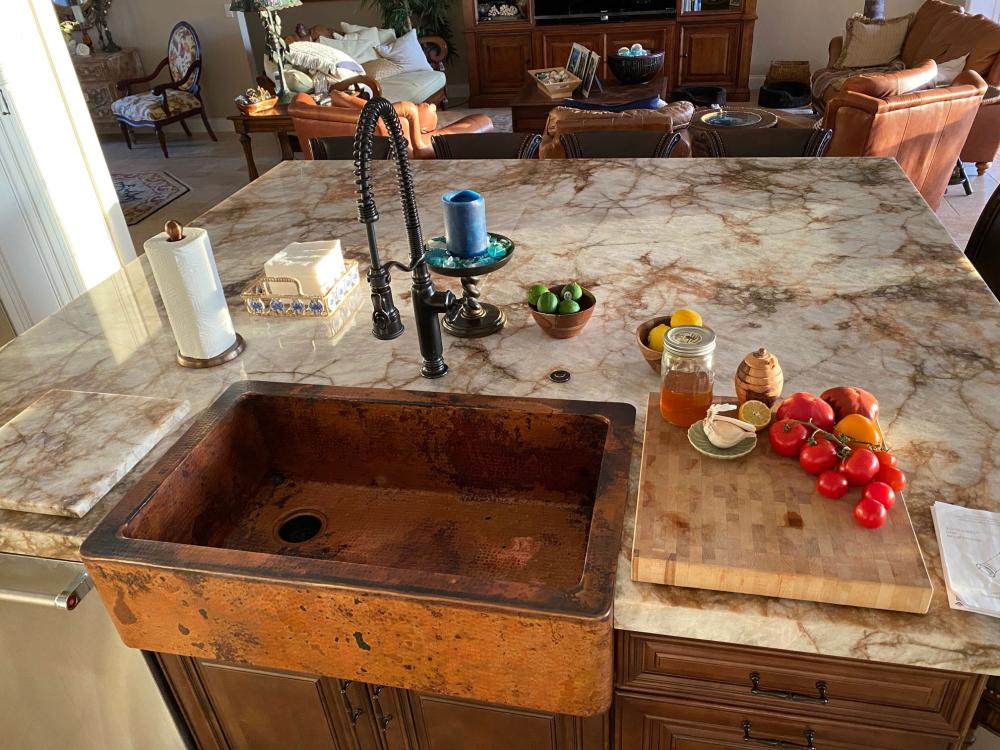
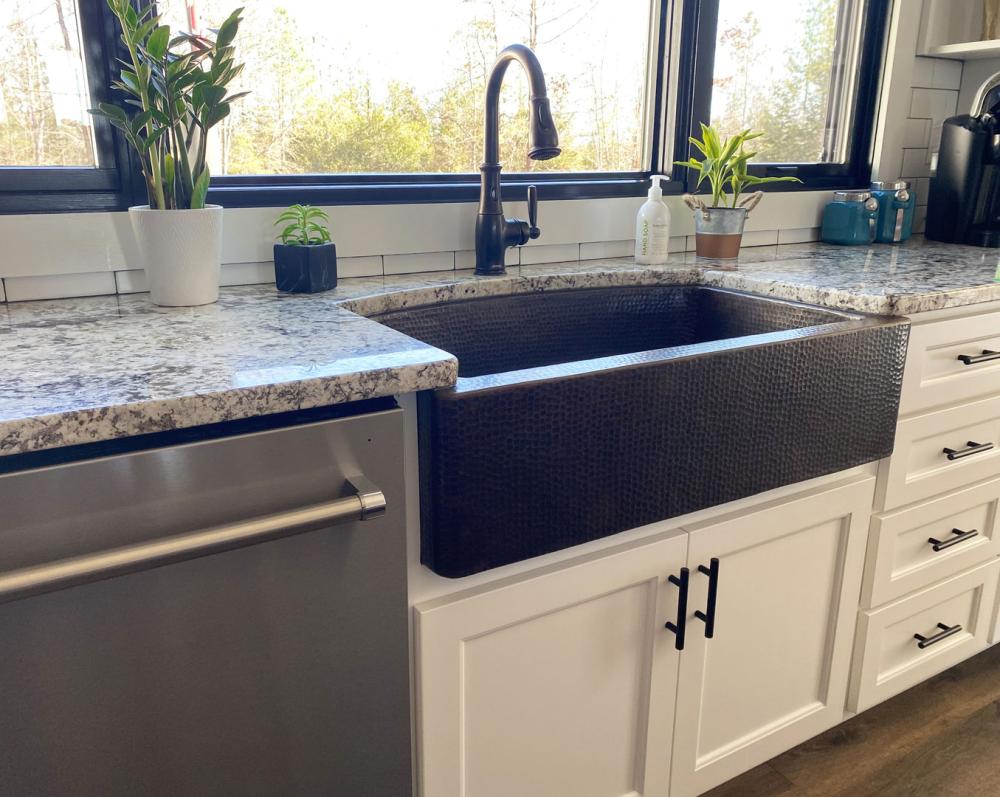
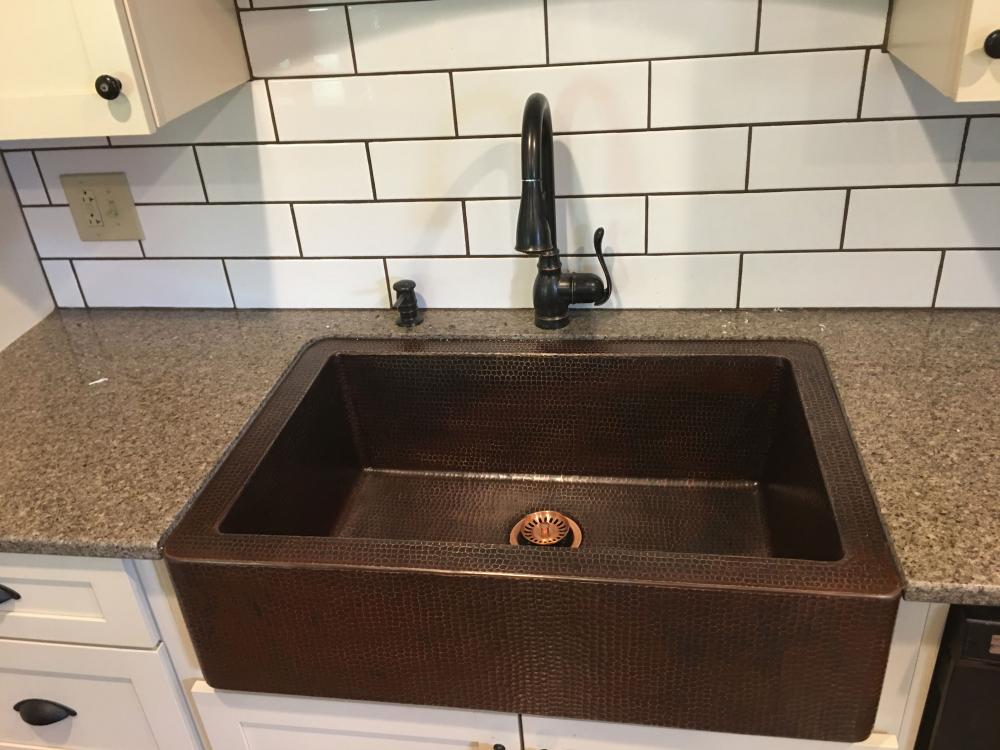
While you have a wide range of sink types to choose from, the farmhouse sink enjoys increasing popularity. Also called an apron sink, these make stunning statement pieces while offering ample interior space to hold even your largest pots and pans, and you’ll find both single and double-basin styles. Of course, you’ll need to know how to choose the right option for your home, as well as how to install a farmhouse sink.

What Is a Farmhouse Sink?
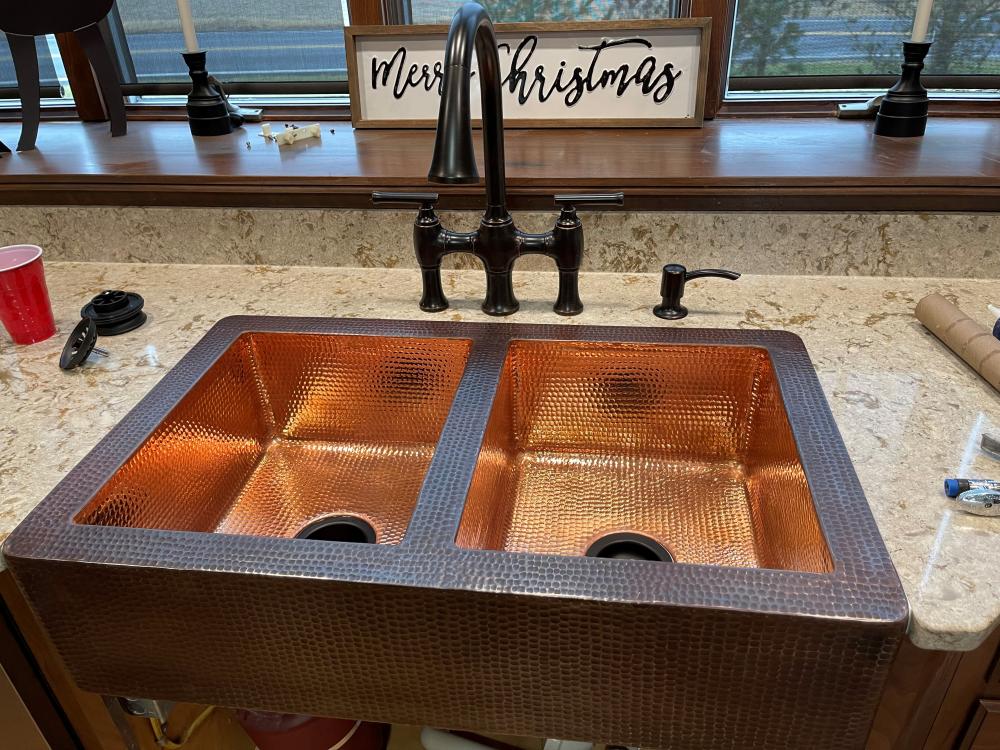
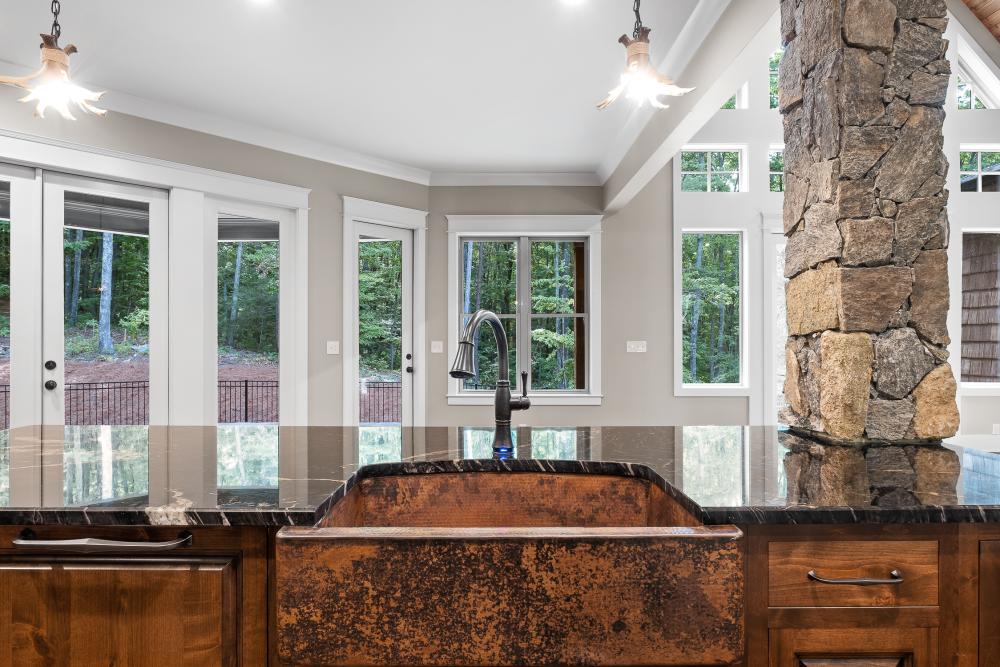
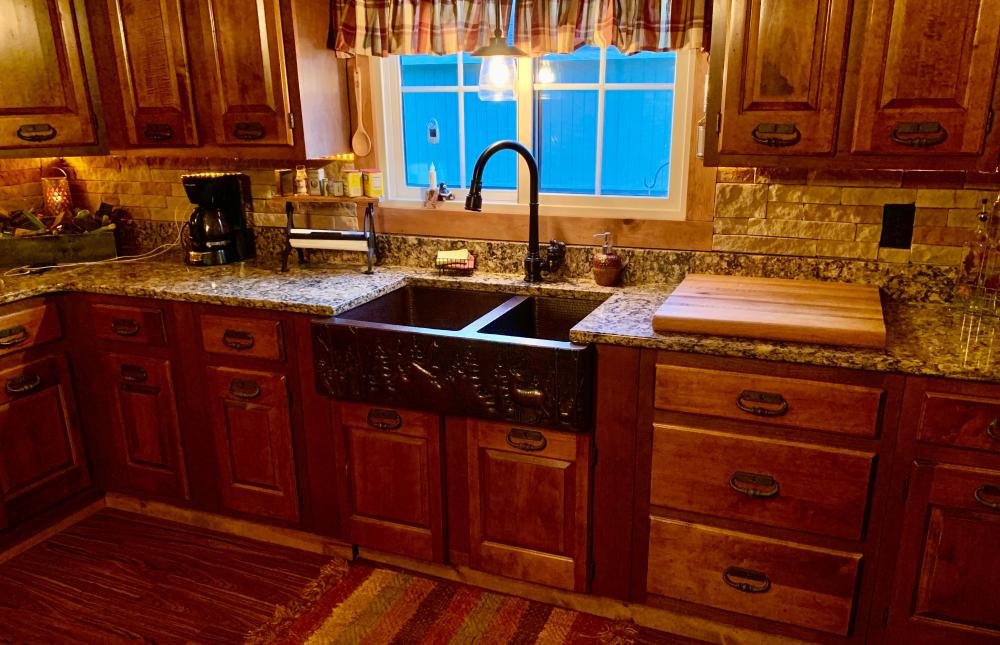
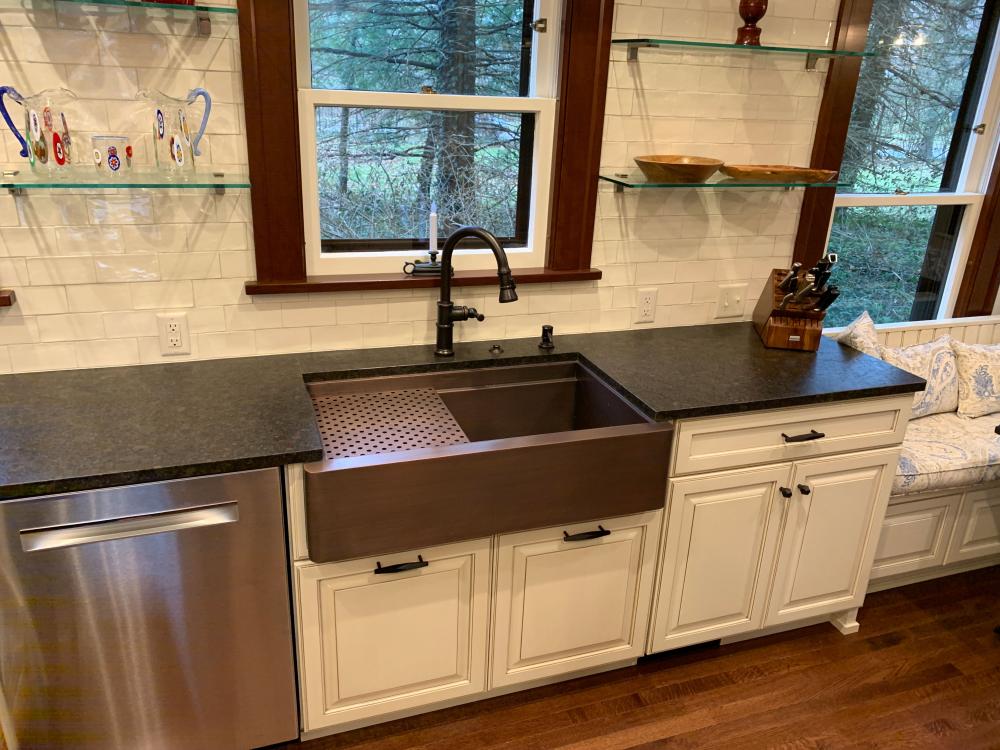
Farmhouse sinks are deep kitchen sinks with exposed fronts. They usually sit just under the countertop, but you’ll find several different styles on offer that can add to your kitchen’s overall design and feel. They have a rustic, traditional look, which makes them better suited for particular design styles, such as French country, American rustic, and traditional kitchens. That said, you’ll discover materials and shapes that allow you to make these sinks work with other aesthetics, including modern.
You’ll also find that farmhouse sinks require different faucet styles than conventional double-basin kitchen sinks. In most cases, you’ll need a larger faucet with a wider overhang. You can choose a faucet finish that complements your sink, whether that’s brushed nickel, copper, or stainless steel.
Is a Farmhouse Sink Right for My Kitchen?
Farmhouse sinks are eye-catching and offer dramatically more workspace than conventional sinks. Are they the right choice for your kitchen, though? Here’s how to tell:
- Do you need additional sink space?
- Are you willing to lose some of your under-sink storage space?
- Do you often prepare food for a large number of people and require a lot of space for soaking dirty dishes?
- Do you do a lot of entertaining?
If you answered “yes” to the questions above, then farmhouse sinks might be the style to consider. Of course, you’ll need to know a few things about the available styles so you can make an informed choice.
Choosing the Right Farmhouse Sink
The first step is to choose the right farmhouse sink for your specific needs. This requires considering a few important factors.
Material
First, think about the material you want. You can buy a farmhouse sink made from copper, enamel-coated cast iron, or stainless steel. Each material brings a slightly different look and feel to your kitchen space.
Style
In addition to the material, you’ll need to consider the style you want. Do you want a flat front? Would a convex front be better suited? Other options include semi-convex and recessed.
Type
You have three types of farmhouse sinks to choose from:
- Top-mount sinks are the simplest to install and can work with virtually any type of countertop.
- Flush-mount sinks require a solid surface or custom-made laminate countertop and sit even with the top of the counter.
- Under-mount sinks sit beneath the counter and require a waterproof top custom cut to fit your sink of choice.
Most farmhouse sinks installed today are under-mount. Top and flush-mount sinks are gaining in popularity, though.
Bowls/Basins and Drainboards
Classic farmhouse sinks include one large basin/bowl. However, today’s designs let you choose from models with two or even three basins to suit your usage needs. Some also come with drainboards, which can hold dishes while they dry, allowing the water to drip back into the sink.

Preparing for Installation
Once you’ve chosen the right farmhouse sink for your usage needs and the style of your kitchen, it’s time to think about installation. The right preparation is key to installing your sink without any issues. You’ll need the right tools and materials, and you’ll also need accurate measurements of your cabinet space.
Tools and Materials Needed
| Tools You’ll Need | |
| Mount | Wall, Island, Undercabinet |
| Width | 30" - 100" |
| Height | 24" - 100" |
| Depth | 22" - 33" |
| Material | Stainless Steel, Copper, Brass, Powder Coated |
| Texture | Smooth and Hammered |
| Accessories | Rivets, Straps, Pot Rail, Crown |
| Materials You’ll Need | |
| Room | Kitchen, Outdoor |
| Style | Artisan |
| Ventilation | 290, 395, 610, 1260 CFM |
| Remote Blower | 395, 835, 1260 CFM |
| CAD Approval | Yes |
| Tolerance | 1/8" |
| Manufacturer | CopperSmith® |
|
Farmhouse Sink Installation: Tools You’ll Need |
|
|
Pencil |
Electric drill |
|
Jigsaw |
Circular saw/miter saw |
|
Bubble level |
Pipe cutter |
|
Pipe cleaning tool |
Deburring tool |
|
Tape measure |
Sandpaper |
|
Bucket/large bowl |
Screwdriver |
|
Utility knife |
Drop cloth/tarp |
|
Gloves |
Caulk gun |
|
Broom and dustpan |
Shop vac/vacuum |
|
Farmhouse Sink Installation: Materials You’ll Need |
|
|
New farmhouse sink |
Kitchen faucet |
|
Plywood (3/4-in thick) |
Two 2x4s |
|
2-inch wood screws |
Silicone caulk |
|
Wood glue |
Painter’s tape |
In addition to the right materials and tools, you’ll also need to take a few additional steps.
- Go ahead and cover the floor with a drop cloth or tarp. The process can make a mess, and this will help simplify cleanup.
- If your kitchen isn’t well-lit, we recommend investing in some lighting so you can see what you’re doing.
Measuring Cabinet Space
Once you’ve got your tools and supplies, it’s time to move to the next step in the farmhouse sink installation process: measuring your sink base cabinet space. Remove the items from under the sink and set them aside.
When the cabinets are clear, measure the interior space from side to side and front to rear. Write those numbers down. Next, measure the outside from just below the countertop projection to the bottom of the cabinet’s false front. Write that number down, too.
The three numbers you just wrote down are the dimensions that your sink must meet. Ideally, you’ll have between 1/4 and 1/8 inches of space left all the way around so that the sink doesn’t interfere with the opening of your cabinet doors. Verify this by measuring your farmhouse sink (front to back and side to side on the exterior of the sink).
- Using a tape measure, measure the width, depth, and height of your cabinet space.
- Verify that the farmhouse sink will fit in your cabinet.
Removing the Old Sink and Countertop
On the day of installation, you’ll need to remove the old sink and the countertop. Note that this step may vary depending on the type of farmhouse sink you’ve chosen. For instance, if the farmhouse sink requires a solid material countertop and you have an older laminate countertop, you’ll need to replace the entire countertop rather than just cutting it to accommodate the new sink. This may be a great opportunity to refresh the countertops throughout your kitchen, depending on your budget.
Disconnecting Plumbing Fixtures
Start by turning off the water to the sink. You can then disconnect the plumbing fixtures. You’ll need to loosen the connector that merges the downpipe from the sink to the P-trap. If your sink has a sprayer, you’ll need to disconnect the flexible hose that connects it to the water lines. Disconnect the water lines from the faucet, too.
- Turn off the water.
- Disconnect the water lines from the faucet.
- Turn the large nut connecting the drain to the base of the sink until it comes loose.
- Put a bowl or bucket underneath to catch the water from the P-trap.
If you have a garbage disposal, add these steps to the process:
- Turn off the electricity to the garbage disposal.
- Loosen the garbage disposal hose clamp.
- Disconnect the disposal from the P-trap.
- Loosen the nuts holding the electrical wires and then disconnect them.
- Disconnect the garbage disposal from the drain by pulling on the loop/ear on the retaining ring with a screwdriver.
If you have a dishwasher connected to the drain, add these steps to the process:
- Using a screwdriver or wrench, loosen the band holding the dishwasher drain tube to the plumbing.
- Pull the drain tube free (have a bowl to catch any water that comes out).
Note that if the bottom of your sink is very low, you may need to lower the height of your plumbing, which is where the pipe cutter, deburring tool, and pipe cleaner will be used. If your new sink is not too low, you should not have to modify your plumbing.
Lifting and Removing the Old Sink and Countertop
With the plumbing disconnected, it’s time to remove the sink and the countertop. Begin with the sink. You’ll need to remove the sink clips from underneath and then cut through the sealant around the top of the sink. Finally, lift the sink up and out.
- Locate the clips under the sink and remove them.
- Apply gentle pressure from under the sink to see if it will lift out without further work. If it does not, move to step 3.
- Cut through the sealant around the edge of the sink with a sharp utility knife.
- Lift the sink up and out of the countertop and set it aside.
Removing the countertop will require a bit more effort. Use a screw gun/power drill if your counter is secured with screws. Your countertop may be glued down, however. In this case, you’ll need to use a saw to cut between the counter and the cabinet. Use care here so that you don’t damage either the cabinet or the counter.
- Identify how the countertop is secured (screws or adhesive).
- If the countertop is screwed down, back the screws out and set them aside.
- If the counter is glued down, cut it loose using a saw.
- Once the countertop is freed, work with a helper to lift it off and set it aside.
Modifying the Cabinet Base
With the countertop and sink out of the way, you should be clear to begin modifying the cabinets to hold the new sink. Start by checking that your cabinets are level. If they’re not, level them (shims will help). We also recommend removing the cabinet doors and false-front drawers now to make this process easier.
Cutting the Cabinet Face and Frame
Chances are good that your new farmhouse sink will come with a template. Use it to your advantage. Before using it, line the areas where you’ll be cutting so that the cabinet doesn’t splinter when you cut it.
Next, mark the center point of the cabinet (this should be half the width of your farmhouse sink). Lay the template over the cabinet and use tape to hold it in place. Double-check that it’s even, and then trace it onto the cabinet. Remove the template and use your jigsaw to cut out the outline. You’ll likely need sandpaper to smooth the edges.
- Tape the template in place.
- Trace the outline onto your cabinet.
- Mark the sink’s center point.
- Use your jigsaw to cut the cabinet.
- Smooth the edges with sandpaper.
Building Support Structures
Because your new farmhouse sink will be larger and heavier than your previous one, you’ll need to build supports within the cabinet to help hold it securely. Depending on the model you choose, it could weigh several hundred pounds.
The position of the supports will depend on the type of farmhouse sink you choose. For instance, if you’re installing an under-mount sink, you’ll need to install the supports lower on the inner cabinet walls than if you were installing a top-mount farmhouse sink. Check your installation instructions to determine the appropriate height, then follow these steps:
- Use a straight edge to mark the installation line.
- Double-check with a level.
- Apply glue to the back of the 2x4s.
- Hold the 2x4s in place and then attach them to the inside of the cabinet with your wood screws.
- Install vertical supports that will run from the bottom of the sink to the cabinet base.
- Set the plywood on top of the supports to form a shelf that will hold the sink.
Installing the Farmhouse Sink
Now that you’ve got the supports in place, it’s time to install the sink. This particular example uses an under-mount sink. Top-mounted and flush-mounted sinks require a different installation order (the countertop would be installed first, and then the sink would be set down into it, similar to how a standard kitchen sink is installed).
Positioning and Leveling the Sink
Chances are good you’ll need an extra set of hands for this part of the process. Lift the sink up and position it inside the cabinet. Verify the sink’s height relative to the cabinet. If you need to raise it a little, shims will help.
Double-check that the sink is at the right height. It’s also important to make sure that the sink is centered so that the drain will connect with your plumbing. Finally, check that the sink is level all the way around so that water drains down and out rather than collecting on one side.
- Working with a helper, set the sink in place within the cabinet.
- Check the sink’s height. If it does not sit at the proper height, use shims to raise it.
- Using your bubble level, check that the sink is level.
Securing the Sink
The sink should rest on the supports you installed in a previous step. You will also need to measure and cut two backstops. These are just 2x4s that are tall enough that they reach from the bottom of the cabinet, at least partway up the back of the sink. The sink will sit flush up against the stops so that it cannot slide backward.
Now, you’ll need to apply a generous bead of silicone around the top rim of the sink (it will be sandwiched between the sink and the bottom of the countertop). Once the caulk dries, it will secure the sink to the countertop and prevent it from moving from side to side or forward.
- Make sure the sink rests fully on the supports you built.
- Cut 2 backstops that run from the cabinet base to at least halfway up the sink.
- Install them behind the sink and screw them into the back of the cabinet (this may require taking the sink back out).
- Apply caulk to the top of the sink so that it will adhere to the underside of the countertop when you put it back in place (note: do not do this until you’re ready to install the counter to prevent the caulk from curing prematurely).
Reinstalling Countertops and Plumbing Fixtures
You’re almost done installing your farmhouse sink! Now it’s time to reinstall the countertop and then connect your plumbing fixtures.
Installing and Sealing Countertops
Chances are good that you’ll need to modify the sink cutout on your countertop. Use your farmhouse sink’s measurements to outline how much you’ll need to trim around the sides. You’ll also need to cut the front out so that it fits correctly.
Note that the counter should be flush with the sink’s vertical plane. It should not extend inward beyond that point. In the last step, you applied silicone caulk around the top of the sink. The countertop should rest directly on this (install the countertop BEFORE the caulk dries).
- Note how your countertop was secured originally. If it was screwed down previously, use the same screws to resecure it. If it was secured with glue, apply the glue/sealant first before setting the countertop in place.
- Working with someone else, lift the countertop.
- Gently set the countertop in place.
- Secure the countertop.
Quick tip: Professional countertop installers can make this process fast and simple while ensuring that the hole cut for the sink is 100% accurate.
Reconnecting Plumbing Fixtures
With the sink and countertop in place, you can reconnect the plumbing. Don’t fully tighten the fittings just yet, though. Connect the drain to the bottom of the sink and then connect the water lines. Leave the water off for the moment. Once you have all the fittings in place, you can begin tightening them. Note that you may need to use plumber’s putty to secure some connections. Turn the water back on and test for leaks before moving to the next step.
- Connect the drain in the sink to your drainpipe.
- Connect the water lines to the faucet/sprayer.
- Once all connections are in place, tighten them fully (but do not overtighten).
- Turn the water on.
- Check for leaks.
Quick tip: Make sure that your plumbing is up to par and meets local plumbing codes. If you’re not sure, hire a professional to handle this for you.
Finishing Touches and Adjustments
Your farmhouse sink installation project is almost done. You just need a few finishing touches.
Caulking and Sealing Edges
We recommend running a bead of silicone around the interior edge of the sink/countertop to help prevent water ingress. You should do this even if you have a solid surface countertop to help prevent moisture from getting between the two surfaces.
Make sure the caulk goes on smoothly. Use a light touch to avoid applying too much caulk and marring your sink’s appearance. If you apply too much, you can wipe it away with a clean cloth before it dries.
- Use a caulk gun and high-quality, clear silicone caulk.
- Apply even, easy pressure on the caulk gun’s trigger.
- Run the caulk gun around the inner edge of the sink/countertop while squeezing the trigger gently.
- Wipe off any excess if necessary.
- Allow the caulk to cure for 24 hours before using your new farmhouse sink.
Adjusting Cabinet Doors and Trim
The final step in this process is to replace your cabinet doors and trim. However, this will require some modification because the height of the doors and the position of the trim will have changed. Here’s what you need to do:
- Measure the height of the new opening under the farmhouse sink.
- Measure your doors and mark the new height.
- Remove all the old hardware (hinges, knobs, etc.).
- Cut the doors to fit the new height.
- Mark the new positions of the hinges, handles, and other hardware.
- Cut or drill new installation holes for your handles. Pilot holes may make installing the hinges easier, as well.
- Install the hinges and handles/knobs.
- Install the doors in their new position under the sink.
Note that if you want to keep your cabinet doors the same style, cut to the bottom of the inset on top, then remove the remaining material from the middle. Drill holes and install wood dowels in the top section. Glue the top piece to the bottom, and the door will look the same as it did previously, just shorter.
If you had false-front drawers under your old kitchen sink, chances are good they will no longer fit. You can cut them into trim pieces to fit around the edges of the sink if necessary.
- Cut your trim pieces to fit. You’ll need one per side plus another piece for the bottom.
- Glue the pieces together before installing them to create a seamless look.
- Install the trim pieces as a frame around the new farmhouse sink. Use glue or screws to hold them in place.
Quick tip: We recommend using a table saw and a high tooth-count blade to ensure that the cuts made in both the cabinet doors and false-front drawers are as smooth as possible. While you can use a circular saw for this process, you’ll need to do more finish work to smooth out the cuts.
Optional: Skip the Doors and Hang Curtains
Don’t want to go through the trouble of cutting the doors to fit the new sink? Go with something shabby chic and install a small curtain rod with curtains that run from the sink to the bottom of the cabinet. It’s a fun way to add some color and flair to your space, and it reduces the amount of work you must do.
Here’s to Your New Farmhouse Sink
Installing a new farmhouse sink can give you more workspace in your kitchen and add eye-catching style, too. Whether you’re going for a complete remodel or just want to freshen things up, the right farmhouse sink can help. The process is also surprisingly simple. Most homeowners can handle sink installation with a few basic tools and a little free time over the weekend. The most important rules to remember are:
- Make sure your measurements are accurate. Take your time and double-check all measurements.
- Use the template that comes with your new farmhouse sink to ensure that your counter and cabinets are cut correctly.
- Don’t skip the final sealing step, or water may work its way between the sink and the countertop.
With a little time, patience, and the right tools, you can transform your kitchen with a new farmhouse sink. Feel free to contact our sales team in regards to our kitchen hoods!

 By submitting, you agree to our Privacy Policy & Terms