

Four technical checks connect a copper hood’s form to its ventilation equipment, installation, and room dimensions.

A CopperSmith CX8 Copper Range Hood
Before ordering a copper range hood, confirm its construction and support, the exact insert or liner, the installation requirements, and the final dimensions. A decorative shell and its ventilation equipment work as one assembly. Review the approved drawings and equipment manuals with the qualified installer before fabrication and site work.
Four Technical Questions Before Buying a Copper Range Hood
A copper range hood should be considered while the cooking wall, cabinetry, and duct route are still being planned. The shape can establish the room’s proportions, but its support and ventilation requirements need equal attention.
The original article identified four recurring issues: material construction, insert compatibility, installation, and size. They remain useful checks. Resolve them in the specification rather than discovering a mismatch when the shell arrives.
Four checks before ordering
1. Copper Thickness: What Is the Complete Construction?
Ask for the selected metal, body thickness, weight, seams, internal structure, and mounting system. Sheet gauge describes thickness within its relevant system; it does not by itself establish strength, rigidity, or how the hood should attach to a building.
Do not assume that every current copper hood uses one gauge, or equate a gauge number with an ounce-per-square-foot specification without checking the actual material specification. Decorative straps and the hood body can also have different construction.
The Artisan AT1 product specification distinguishes the form, mount, dimensions, optional details, and ventilation selections. Use the current specification for the chosen configuration. Do not copy a thickness statement from an older article into the installation plan.
2. Will the Insert Fan Fit?
Confirm the exact insert or liner model before the shell is finalized. Check the required opening, overall dimensions, depth, outlet size and position, electrical connection, and access for filters and servicing. A similar outside width does not establish compatibility.
A customer-provided insert also needs review. The current AT1 specification includes a compatible customer-provided insert option, but that does not mean every insert will fit every hood. Provide the manufacturer’s drawing and installation manual for confirmation.
Coordinate the intake location and effective capture area with the cooktop. The decorative shell can extend beyond the actual ventilation opening. Confirm the complete assembly in the project drawing rather than using a photograph as a dimensional template.
3. What Does Installation Require?
Use qualified trades for the structural mounting, electrical work, and ventilation installation, with licensing and permits as locally required. Identify who will coordinate those tasks and verify the wall or ceiling support before the finish work is complete.
CopperSmith’s wall-mount hood installation sheet describes the shell and insert installation sequence and addresses attachment to suitable wall structure. Read it with the current liner and cooktop instructions. A general shell sheet does not supply every equipment clearance or authorize an improvised fixing method.
The PNNL kitchen exhaust duct guide emphasizes a suitable duct size, a direct route, and installation to the manufacturer’s instructions. Have the installer review the actual run, turns, outlet, and building air balance. Do not assume a high fan rating compensates for any duct restriction.
Keep the current installation guides with the equipment manuals and approved project drawings. If a requirement conflicts or is missing, resolve it with the relevant manufacturer and installer before the work proceeds.
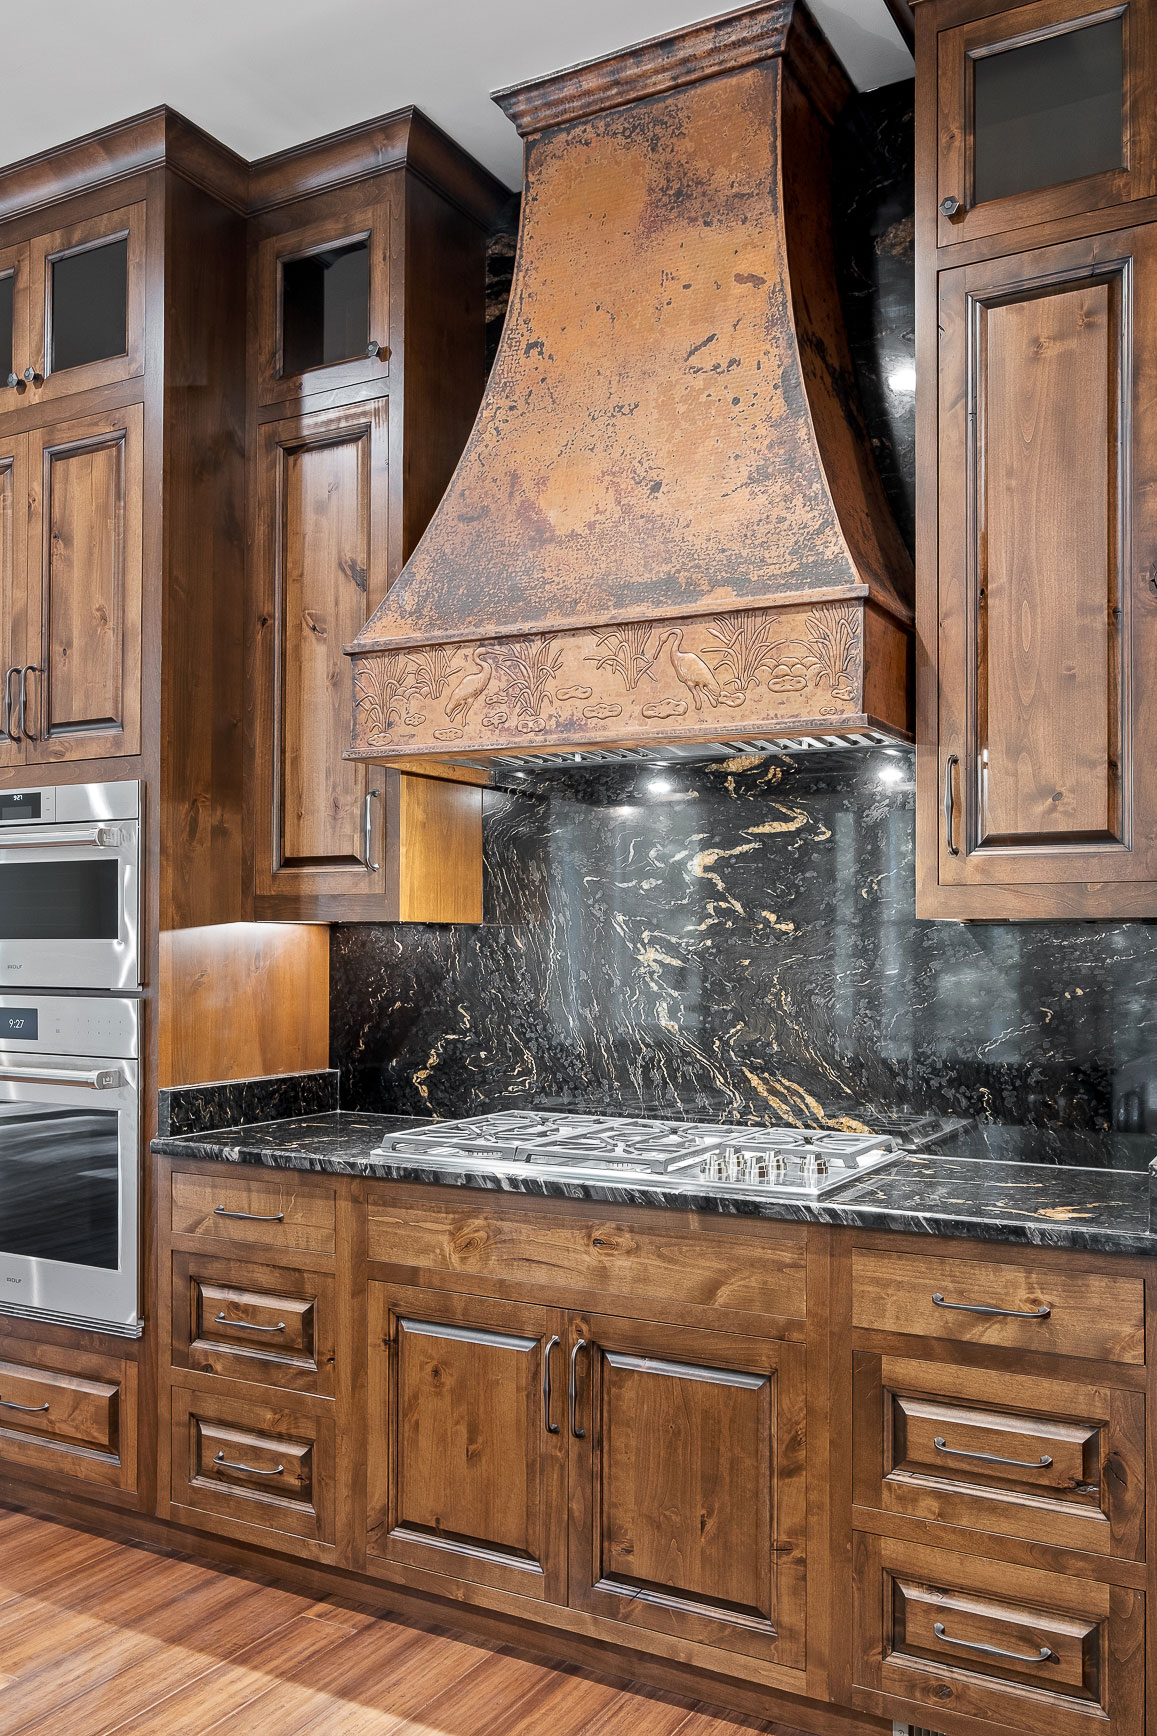
Material, apron detail, and proportion connect this hood to the surrounding wood and stone.
4. What Size Should I Purchase?
Confirm the cooktop dimensions, effective capture width and depth, approved mounting height, ceiling height, and surrounding cabinetry. Shell height, mounting clearance, and overall elevation are different measurements. Each belongs on the drawing.
The Home Ventilating Institute’s FAQs directs users to the equipment instructions for mounting height. The related range hood height planning guide explains how to coordinate the hood, liner, and cooktop requirements. No single clearance applies to every model.
For a wall-mounted arrangement, compare wall-mount range hood designs with the cooking wall’s width and upper cabinetry. For an island, review ceiling support, coverage, and sightlines separately. Confirm that the final form and ventilation package fit the same approved dimensions.
What to Have Ready for the Installation Review
Gather the information as one project set. This gives the designer, fabricator, contractor, and ventilation specialist a shared basis for review. Physical finish samples address appearance; equipment drawings and measurements address fit and installation.
- Cooktop model and installation instructions.
- Hood model, material, finish, shell dimensions, and approved drawing.
- Insert or liner model, blower arrangement, outlet, and service clearances.
- Wall or ceiling support plan, duct route, and electrical requirements.
- Mounting reference points and all applicable clearance requirements.
- Confirmation of who approves each detail before fabrication and installation.
Common questions
Can any insert be installed in a custom copper hood?
No. Confirm the exact insert’s dimensions, mounting, duct connection, access, and compatibility before the shell is fabricated.
Does copper gauge tell me how to mount the hood?
No. The mounting system, assembly weight, structural support, fixing details, and installation instructions determine the method.
Should I order the hood before planning the duct?
Coordinate them together. The outlet and duct route can affect the available space, ventilation selection, and final hood dimensions.
Updated October 29, 2026. Published 2014-06-16. Confirm the instructions and specifications for the selected product and configuration.
Define the details around your space.
Bring the cooktop, ventilation model, room measurements, and proposed support arrangement into the design review.
Review the AT1 specification


 By submitting, you agree to our Privacy Policy & Terms